HTML에 있는 속성 을 활용
<body style="background-color:lightgrey;">
    <h1 style="color:blue;">This is a Blue Heading</h1>
</body>
body 는 lightgrey, h1은 blue

색깔을 바꿀수는 있지만 한개가 넘어가면 어느곳에 어떤 스타일이 쓰였는지 적용하기 힘듦
여러가지 디자인을 활용할때
<p> </p>는 css property 라고도 한다
<p style="border:1px solid black;">
This is a paragraph with border
</p>
<p style="border:1px solid black; padding:10px; color:blue;
font-family:courier; font-size:150%;">
This is a paragraph with a lot of styling
</p>border, padding, color, font-family, font-size 여러가지의 property를 활용
property:value 속성:값 으로 이해하면 쉬움 , (;)을 이용하면 여러가지의 속성을 적용시킬 수 있음

컬러 코드를 이용해서 색 변경도 가능
<h1 style="color:lightgrey;">This is a Light Grey Heading</h1>
<h1 style="color:#D3D3D3;">This is a Light Grey Heading</h1>
lightgrey를 #D3D3D3로 변경
Docunemt CSS
<html>
<head>
<title>W3</title>
  <style>
    body {background-color:lightgrey;}
    h1 {color:blue;}
    p {border:1px solid black; padding:10px;}
  </style>
</head>
<body>
  <h1>This is a heading</h1>
  <p>This is a paragraph</p>
</body>
</html>
body, border, pargraph

.css 파일을 활용
<html>
  <head>
    <title>W3</title>
    <link rel="stylesheet" href="path/to/mystyle.css">
  </head>
  <body>
    <h1>This is a heading</h1>
    <p>This is a paragraph</p>
  </body>
</html>
CSS를 조금 더 명확하게 쓰는법
Simple Selector
body {background-color:lightgrey;}
h1 {color:blue;}
p {border:1px solid black; padding:10px;}
body {
background-color:lightgrey;
}
h1 {
color:blue;
}
p {
border:1px solid black;
padding:10px;
}각 속성마다 다른 줄에서 작성
h1, h2 {
    border:1px solid black;
    color:lightgrey;
}
h1,h2가 같이 적용됨
Class Selector
<h1 class="userInfo">This is a heading 1</h1>
<p class="userInfo">This is a paragraph 1</p>
<h2 class="userInfo">This is a heading 2</h2>
<p class="userInfo">This is a paragraph 2</p>

<h1 class="eticket">This is a heading</h1>
<p class="eticket">This is a paragraph</p>
<h2 class="eticket">This is a heading</h2>

p.userInfo {
    border:1px solid black;
    padding:10px;
}

h1.userInfo, h2.userInfo {
    color:blue;
}

.eticket {
    color:green;
}
.userInfo인 값들과 .eticket인 값들에 적용시킬 속성들을 나눌 수 있음
<h1 id="userHeading">This is a heading 1</h1>
<p id="userDetails">This is a paragraph 1</p>

<h2 id="bankHeading">This is a heading 2</h2>
<p id="bankDetails">This is a paragraph 2</p>

#userHeading {
	color:blue;
}
userHeading 의 id를 가진 값들만 속성이 적용됨
CSS 후손과 자식
F가 E의 후손일경우 속성을 적용
E F {
    property:value
    …
}
F가 E의 자식일경우 속성을 적용
E > F {
    property:value
    …
}
예시) 후손
<div>
Some text <i>italic</i> here.
    <p>
    	Hi there <i>italic again</i>
    </p>
    <div>
   		This is the final <i>italic</i>.
    </div>
</div>
div i {
color:red;
}i로 시작하는 모든 코드들이 빨강색으로 적용됨
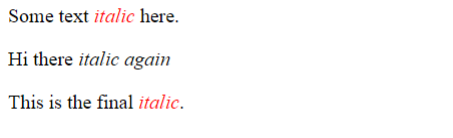
예시) 자식
<div>
Some text <i>italic</i> here.
    <p>
    	Hi there <i>italic again</i>
    </p>
    <div>
   		This is the final <i>italic</i>.
    </div>
</div>
div > i {
color:red;
}div 클래스에 속한 i에 한에서만 적용하는거니까 p클래스에 있는 i는 적용이 안됨
Contextual Selector
<div class="userInfo">
Some text <i>italic</i> here.
    <p>
    	Hi there <i>italic again</i>
    </p>
    <div class="bankInfo">
    	This is the final <i>italic</i>.
    </div>
</div>
div.userInfo i {
color:red;
}userInfo에 속한 i를 빨강색으로 변경
div.userInfo > i {
	color:red;
}
div.bankInfo i {
	color:red;
}
bankInfo에 속한 i를 빤강색으로 변경
div.bankInfo > i {
	color:red;
}
Pseudo class selector
<a href="http://www.uow.edu.au">UOW</a>

a:link {
	color:red;
}

a:visited {
	color:green;
}

h1:hover {
	color:blue;
}
link는 아직 방문하지 못한 링크들을 적용, visited는 방문 한 링크들을 적용, hover는 마우스 커서가 h1에 올라갔을 때 적용
리스트 속성
<ol>
	<li>First level item 1
		<ol>
            <li>Second level item 1.1</li>
            <li>Second level item 1.2</li>
        </ol>
    </li>

	<li>First level item 2
        <ol>
            <li>Second level item 2.1</li>
            <li>Second level item 2.2</li>
        </ol>
    </li>
</ol>
ol {
list-style-type:decimal;
}
ol ol {
list-style-type:upper-roman;
}ol은 숫자로 정렬 ol에 속한 또 다른 ol은 로마식 숫자로 정렬

리스트 속성 - 이미지
ol {
	list-style-image:url(path/to/imagefile);
}

<ol>
    <li>Item 1</li>
    <li>Item 2</li>
</ol>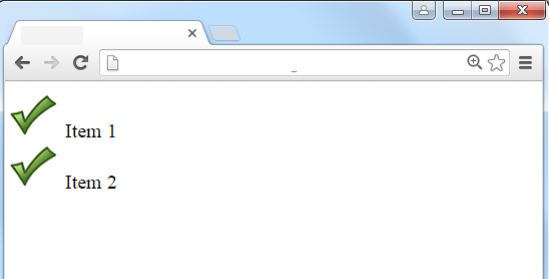
span
같은 줄에 있는 글자나 문장이지만 다른 스타일로 적용시키고 싶을 때
This is how we change the style of some
<span class="specialText">special text</span>.
Here is also
<span class="specialText">special</span>.

span.specialText {
    color:red;
    font-family:Ariel;
    font-size:150%;
}
span을 사용함으로써 speical text라는 글자는 빨강, 다른 폰트, 다른 크기 가 적용됨

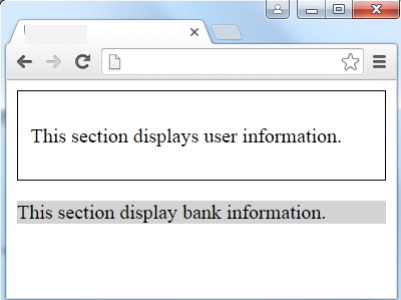
div
각 섹션마다 다른 스타일로 변화를 주고 싶을 때
<div class="userInfo">
<p>This section displays user information.</p>
</div>
<div class="bankInfo">
<p>This section display bank information.</p>
</div>

div.userInfo {
    border:1px solid black;
    padding:10px;
}
    div.bankInfo {
    background-color:lightgrey;
}
userInfo 와 bankInfo 는 같은 페이지에 있지만 각각 다른 스타일로 적용됨
CSS코드를 짤 때 주석은 /*... */ 으로 두어야함
예시)
/* 이렇게
나눠서
쓸수도 있음 */
'코딩 > HTML' 카테고리의 다른 글
| [HTML] 리뷰 (0) | 2024.05.10 |
|---|---|
| [HTML] 자바 스크립트 응용 (Form 태그, (0) | 2024.04.22 |
| [HTML] Java Script 를 배워보자 (0) | 2024.04.11 |
| [HTML] 입문 ( li태그, ul태그, ol태그, dl태그, table태그 ) (0) | 2024.04.10 |
| [HTML] Form 을 배워보자 (0) | 2024.04.09 |